"You should build her a cake of something..."
INGREDIENTS:
- 1 cup (2 sticks) unsalted butter, room temperature
- 2 1/2 cups all-purpose flour (spooned and leveled)
- 1/2 teaspoon baking powder
- 1/2 teaspoon baking soda
- 1 teaspoon salt
- 1 teaspoon cinnamon
- 1/2 teaspoon nutmeg
- 2 dashes of cayenne pepper
- 1 1/2 cups sugar
- 2 large eggs plus 3 large egg yolks
- 2 teaspoons pure vanilla extract
- 1 cup low-fat buttermilk
Preheat oven to 350 degrees. Butter the pans, for extra assurance that it'll come out, cut out parchment circles and place in the bottom of the pan.
- In a medium bowl, whisk flour, baking powder, baking soda, spice, and salt.
- In a large bowl, using an electric mixer, beat butter and sugar until light and fluffy. With mixer on low, beat in eggs and yolks, one at a time. Beat in vanilla.
- Alternately beat in flour mixture and buttermilk, beginning and ending with flour mixture; mix just until combined.
- Divide batter between pans; smooth tops. Bake until cakes pull away from sides of pans, 32 to 35 minutes. Let cool in pans 10 minutes. Run a knife around edges of pans and invert cakes onto a wire rack. Let cool completely. (I just let it cool til I can touch the pan and stick it in the freezer for 30 mins-- I don't have wire racks)
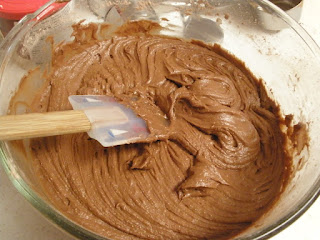
This is what the batter should look like after alternating the buttermilk and dry ingredients:
I divided the batter into three pans instead of two but forgot to reduce the time. The frosting kept it moist, but next time, I would just set the timer for 25 mins instead of 32. Dividing it into three also kept them from making a dome shape--I usually have to cut off the dome to make it flat, but these were fine.
After they came out of the oven:
Before taking the cakes out, I lined my serving plate with three piece of parchment overlapping, so when the cake is done you can just pull them out from under the cake. This keeps the plate clean.
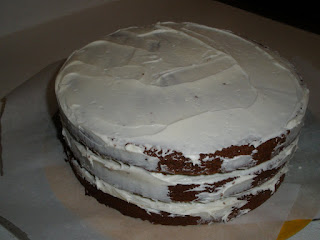
I iced the layers and did a crumb layer around the cake and stuck it in the freezer for 20 more minutes just to harden the crumb coat. ( A crumb coat is a thin layer of frosting around the outside of the cake, it hardens and keeps the cake from crumbing while you're frosting. If you're working with white frosting, it's especially annoying to get specks for cake in it.) I used a store bought cream cheese, I like this flavor with this cake because it compliments the spice:
Frost the rest of the cake:
To get a smoother surface, I wet a butter knife with hot water and smoothed the edges while the knife was still wet:
For the letter, I printed and cut out a nice scripty font that was still easy to cut and placed it on the center. Then I dusted the cake with cocoa powder through a sieve. I used too much cocoa powder, I guess my sieve wasn't as fine as I thought. Use a toothpick to lift up and end of the letter and carefully lift straight up:
Now, off to the birthday!
(This is the inside:)


